Create Provisioning Profiles
The next phase of this glorious journey is to create eight provisioning profiles: 4 Ad Hoc and 4 App Store. You will email the four Ad Hoc profiles, and your P12 certificate (which you will create after your provisioning profiles), to branding@owncloud.com after building your branded app with the ownBrander app on Customer.owncloud.com. Do not send us the App Store profiles. All eight of these profiles must be stored on your Mac PC.
First Ad Hoc Provisioning Profile
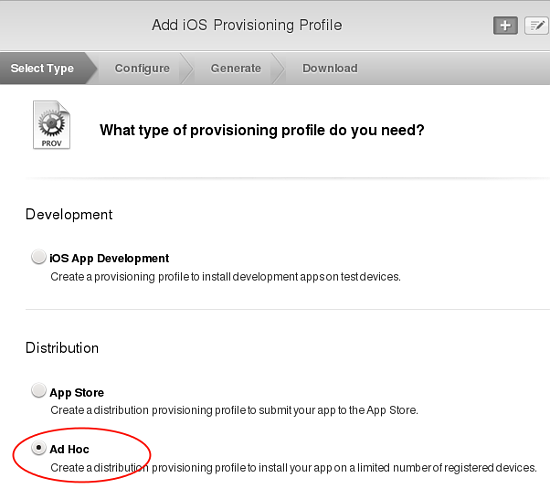
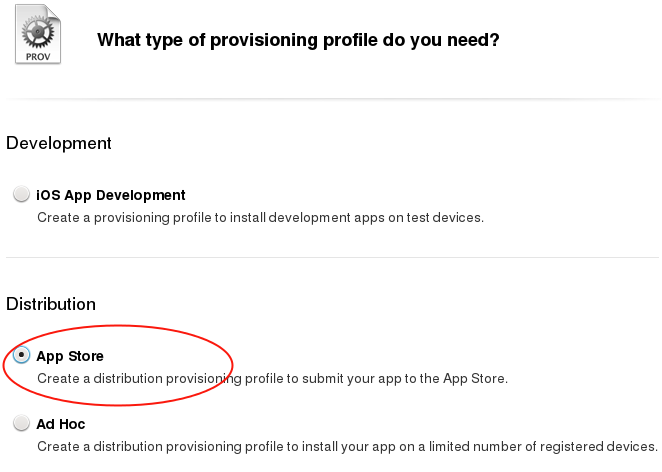
Go to Provisioning Profiles > All, then click the plus button (top right) to open the Add iOS Provisioning Profile screen. Select Ad Hoc and click Continue.
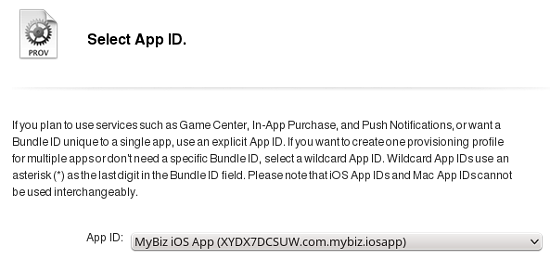
On the Select App ID screen select the first of the three App IDs that you created and click Continue. (The first one has the shortest name, if you followed the naming conventions in this manual.)
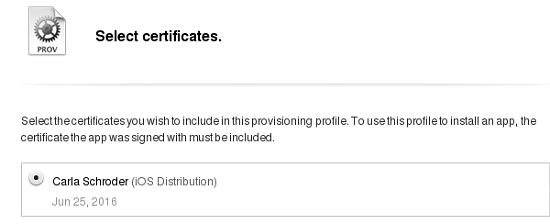
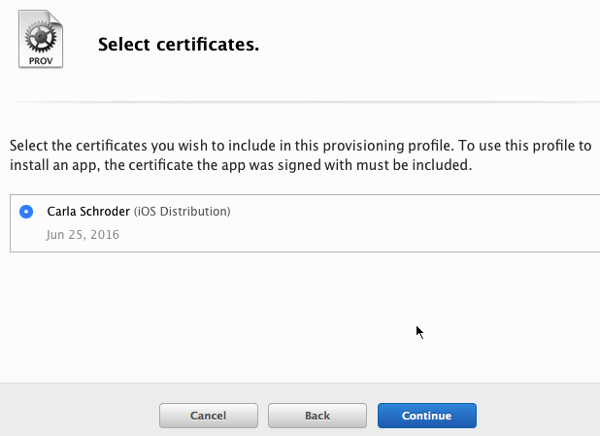
Select the certificate that you created at the beginning of this process and click Continue.
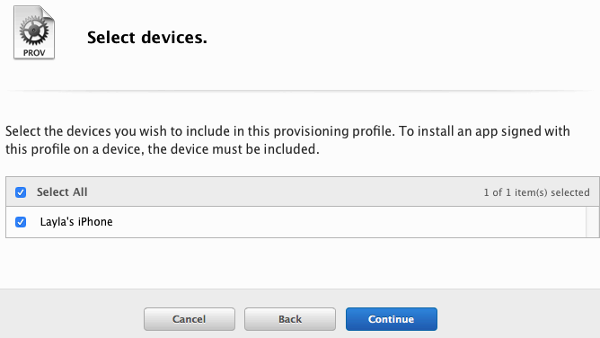
Select the devices that you want to install and test your app on, then click Continue.
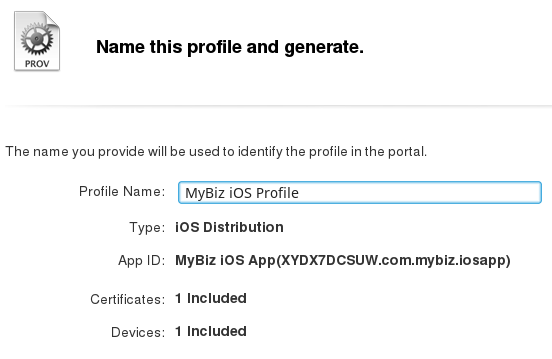
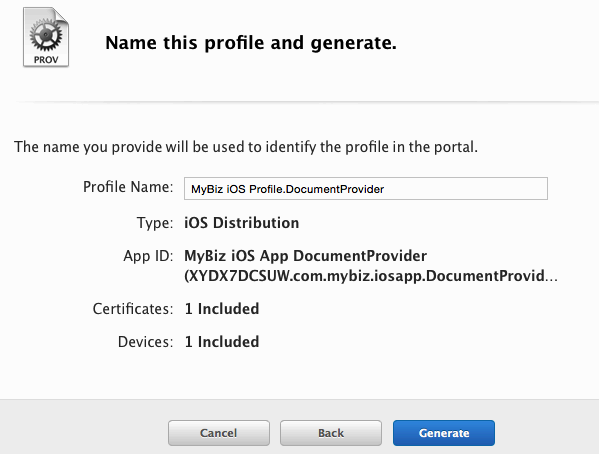
Name your provisioning profile with a descriptive Profile Name and click Generate.
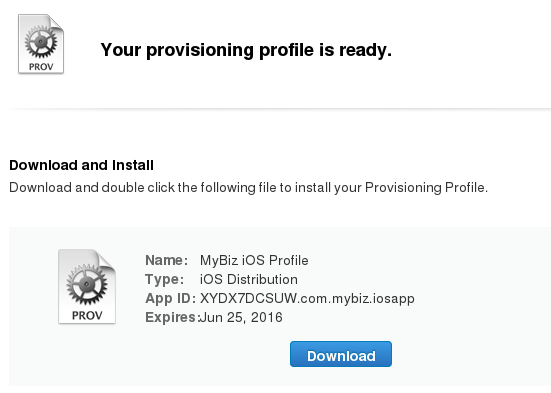
When it has generated, download your new profile to your Mac computer.
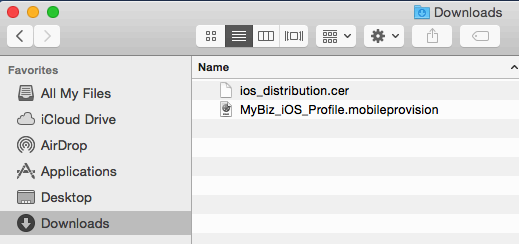
Find it on your Mac (usually the Download folder) and double-click to install it in Xcode.
Second Ad Hoc Provisioning Profile
Return to the “Your provision profile is ready” screen, scroll to the bottom and click Add Another. On the following screen select Ad Hoc and click Continue.
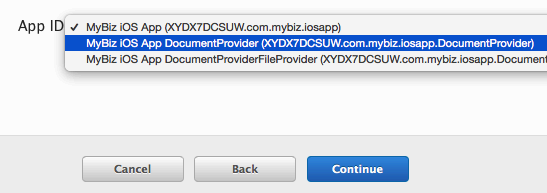
This time select the .DocumentProvider app ID and click Continue.
Select the certificate that you created at the beginning of this process and click Continue.
Select the devices that you want to install and test your app on, then click Continue. These must be the same devices you selected for the first provisioning profile.
Give this provisioning profile the same name as your first profile, plus .DocumentProvider and click Generate.
Just like the first provisioning profile, download it to your Mac computer, and then double-click to install it in Xcode.
Third Ad Hoc Provisioning Profile
Return to the “Your provision profile is ready” screen, scroll to the bottom and click Add Another. On the following screen select Ad Hoc and click Continue.
This time select the .DocumentProviderFileProvider app ID and click Continue.

Select the certificate that you created at the beginning of this process and click Continue.
Select the devices that you want to install and test your app on, then click Continue. These must be the same devices you selected for the first provisioning profile.
Give this provisioning profile the same name as your first profile plus .DocumentProviderFileProvider and click Generate. There is a 50-character limit, but don’t worry about counting characters because it will be automatically truncated if you go over.
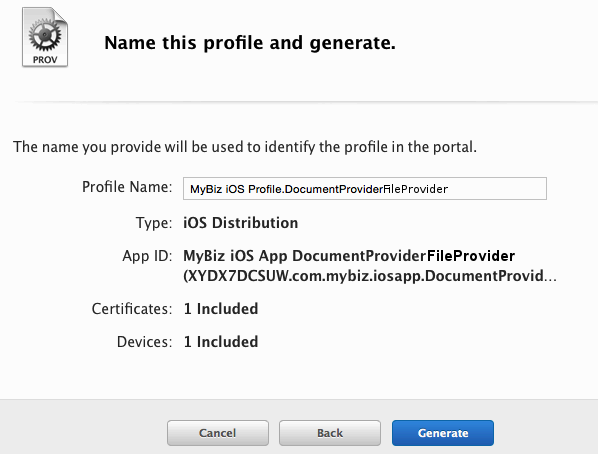
Download it to your Mac computer, and then double-click to install it in Xcode.
Fourth Ad Hoc Provisioning Profile
Return to the “Your provision profile is ready” screen, scroll to the bottom and click Add Another. On the following screen select Ad Hoc and click Continue.
This time select the .ShareExtApp app ID and click Continue.

Select the certificate that you created at the beginning of this process and click Continue.
Select the devices that you want to install and test your app on, then click Continue. These must be the same devices you selected for the first provisioning profile.
Give this provisioning profile the same name as your first profile plus .ShareExtApp and click Generate. There is a 50-character limit, but don’t worry about counting characters because it will be automatically truncated if you go over.

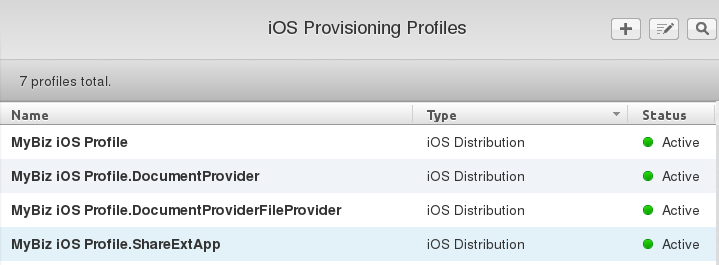
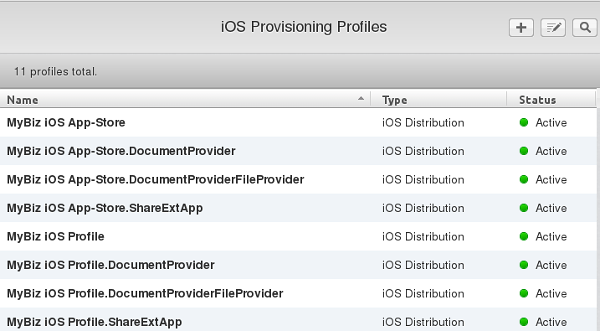
Download it to your Mac computer, and then double-click to install it in Xcode. You should now see all of your Ad Hoc provisioning profiles listed in your “iOS Provisioning Profiles”.
Create Four App Store Profiles
Creating your four App Store profiles is the same as creating your Ad Hoc profiles, except that when you start you check the App Store checkbox, and you won’t select testing devices.
When you’re finished, you’ll have eight new provisioning profiles. Remember, when you build your app on ownBuilder you only send in the four Ad Hoc profiles, plus your P12 certificate.
Go to the next page to learn how to create your P12 certificate.