Creating Branded Client Apps (Enterprise Only)
Overview
ownBrander is an ownCloud build service that is exclusive to Enterprise customers for creating branded Android and iOS ownCloud sync apps, and branded ownCloud desktop sync clients. You build your apps with the ownBrander app on your Customer.owncloud.com accounts, and within 24-48 hours they are loaded into your account.
Building a Branded iOS App
Building a branded iOS app requires your own artwork, and you must create a P12 certificate and four provisioning profiles for digitally signing your apps. Apple has strict and specific requirements, so it is a lengthy process. See Creating Branded iOS Apps (ES only) for a complete tutorial.
Building an Android App or Desktop Sync Client
To build Android and Desktop sync apps you need to supply your own artwork, and the ownBrander wizard details the required specifications.
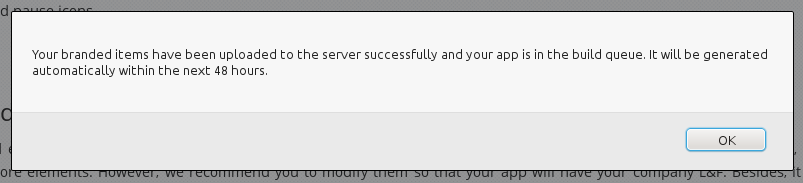
When you have completed the wizard, you will either get messages warning you of any items that need to be corrected, or a success message:
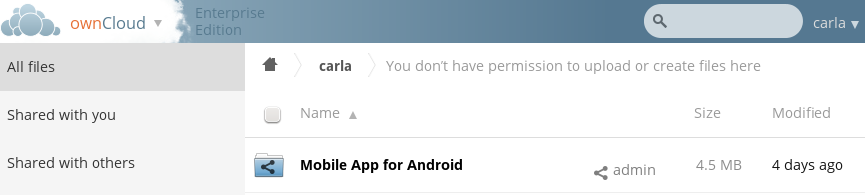
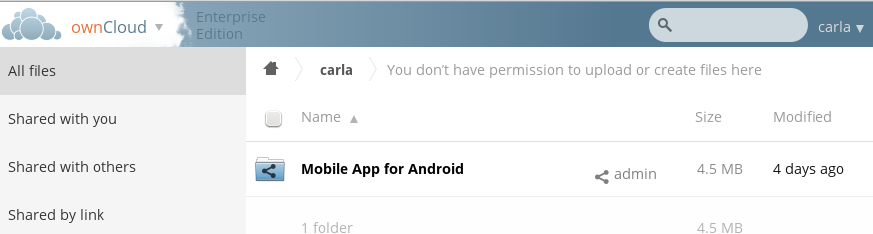
When your new app is built, which may take up to 48 hours, it will appear in your personal folder on the Files page.
Using the Wizard
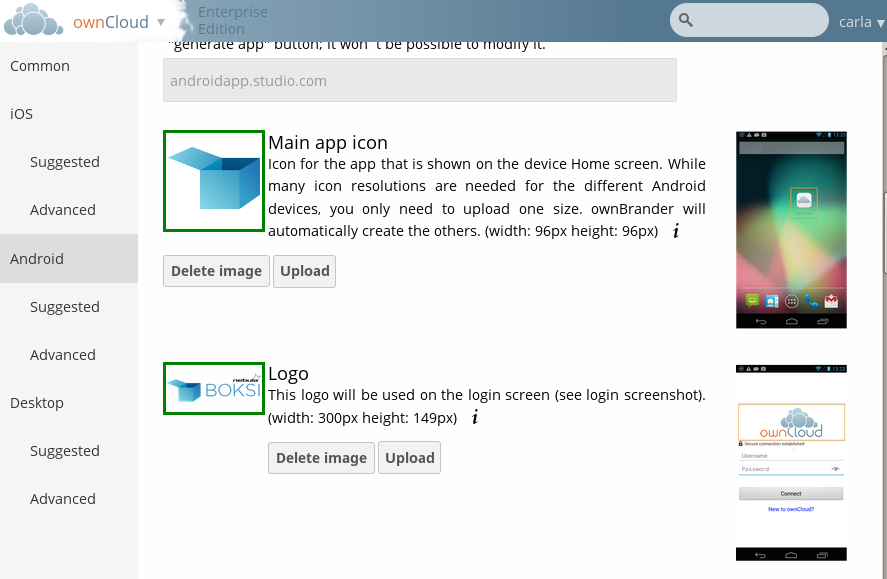
You can play around with ownBrander and create some apps for testing and learning. The Android and Desktop sync clients are the easiest to use for testing, so we’ll walk through creating an Android app. You need a just a few images, and the wizard tells you their required dimensions. They must be the exact specified dimensions, preferably in PNG format.
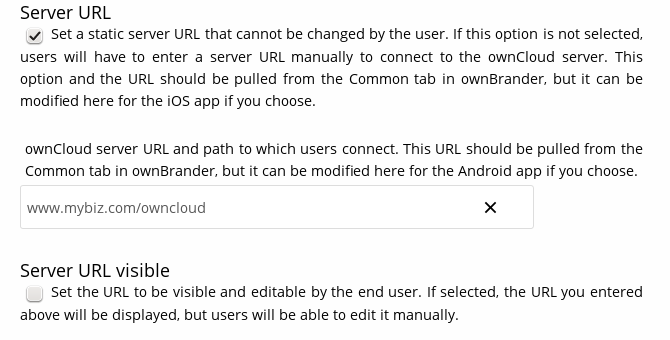
First, start on the Common tab and enter your application name and the URL to your ownCloud server. For testing purposes these can be anything. These are your global defaults, and you can change them when you create your apps. When you create production apps, then you must use your real app name, and the URL must point to your real ownCloud server.

Next, go to the Android tab. This has three sections: Required, Suggested, and Advanced. Start in the Required section with your application name and server URL, which should be already entered from the Common tab. You may change these, and optionally check Server URL visible to allow users to change it.
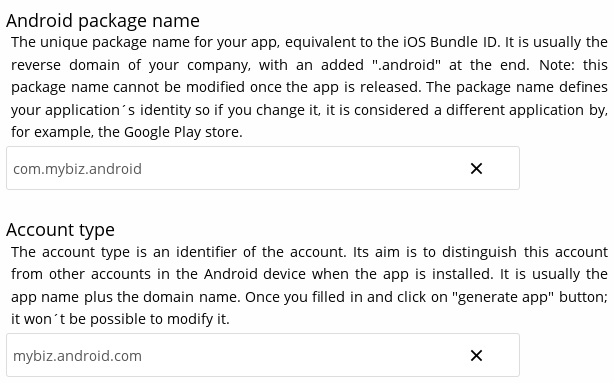
Now enter your Android package name. This is the unique name that identifies it to Google Play. Then enter your account type; this identifies it on your users’ Android devices.
Your next three options are Show multiaccount or disconnect, Enable send to other apps features, and Enable SAML. When you enable Show multiaccount or disconnect, your users can configure multiple ownCloud accounts. When it is disabled they see only a disconnect button.
Enable SAML is for ownCloud servers that use SAML (Security Assertion Markup Language) authentication.
Enable send to other apps features allows your users to open ownCloud files with other Android apps, such as file managers and photo galleries.
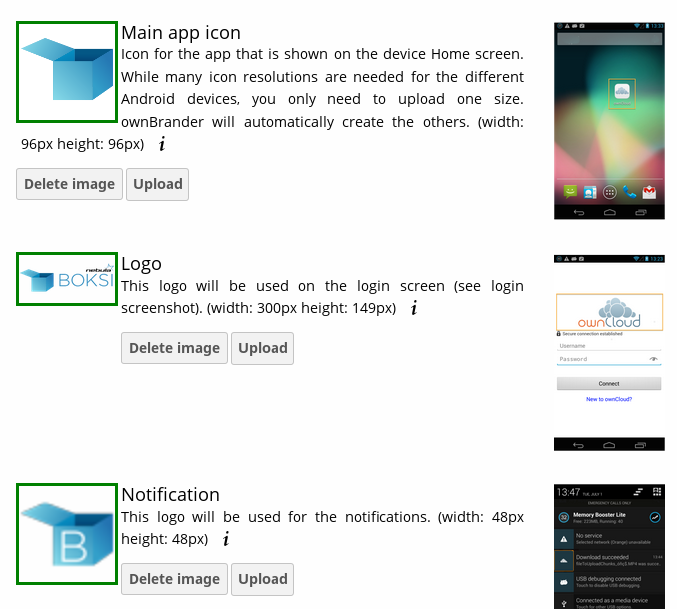
Next, upload your images. The wizard tells you the exact size they must be, and you can click the images on the right to see some example screenshots.
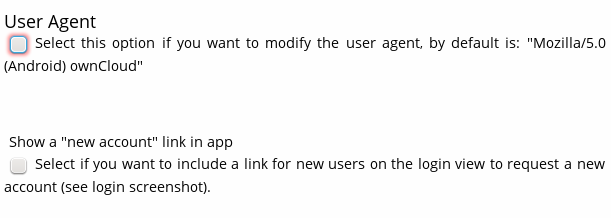
You may enter a custom user agent, if you wish, and display a new account link button to your users. You need this to enable multiaccounts.
Signing Android Client
The next option is Sign Android Client. You can upload your signing certificate in the wizard so that is signed during the build process, or you can optionally sign your app after we build it. See Distributing Your Branded Android App (Enterprise Only) to learn how to sign your app after it is built.
Root folder name displays the root folder name on your user’s devices.
Help url is for entering a link to your help page for the app.
Activate “Recommend” option displays a “recommend this app” option via email.
Use Activate the option feedback to display an email address for user feedback.
Imprint URL is for the about page on your Web site, or any page that has information about your company.
Enter any custom download link in URL to download the app.
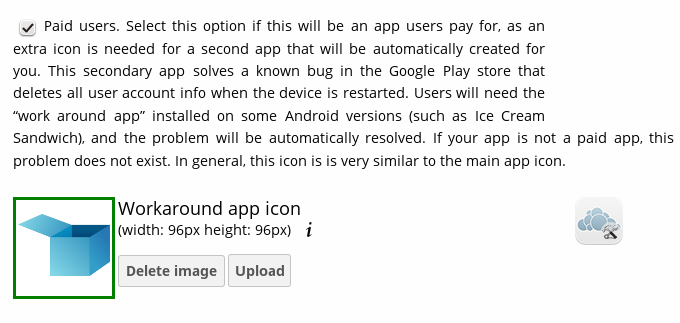
Finally, if you are creating a paid app then check the checkbox for Paid Users and upload an icon.
The Suggested and Advanced sections allow you to further customize your branding with custom colors and images.
When you are finished click the Generate Android App button, and you will either see a success message, or an error message telling you what you need to fix. Note also that at the bottom of the wizard, the name and version of your new app is displayed, for example The version that it will be generated is: oc-android-1.7.0_signed. When all of your options are entered correctly and you click the Generate Android App button, it takes up to 48 hours for your app to appear in your Customer.owncloud.com account.