Server Tuning & Performance Tips
There are a number of options to tune the ownCloud installation and enable a high level of performance. The database, for example, needs indexes in the most active tables. The number of live Apache connections needs to be turned up to 1000 or more, and the number of allowed MySQL connections also has to be increased to the same. Turning on the Alternative PHP Cache (APC) will also increase performance on the app servers, and there are likely a number of environment and policy specific configurations needed as well in any given deployment.
This chapter gives a few hands-on tips on how to achieve this.
PHP Version and Information
You will need to know your PHP version and configurations. To do this, create a plain-text file named phpinfo.php and place it in your Web root, for example /var/www/html/phpinfo.php. (Your Web root may be in a different location; your Linux distribution documentation will tell you where.) This file contains just this line:
<?php phpinfo(); ?>
Open this file in a Web browser:
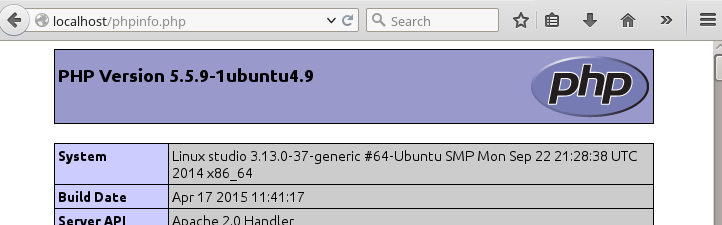
Your PHP version is at the top, and the rest of the page contains abundant system information such as active modules, active .ini files, and much more. When you are finished reviewing your information you must delete phpinfo.php, or move it outside of your Web directory, because it is a security risk to expose such sensitive data.
General Linux tuning
System configuration overview
# cat /etc/sysctl.conf
...
net.core.somaxconn = 4096
net.ipv4.tcp_max_syn_backlog = 2048
...
# ulimit -nH 4096
Make sure that your /tmp is in ramdisk which improves session handling performance. To do so, add the following to /etc/fstab:
none /tmp tmpfs,size=6g defaults
Caching
Note
Memory cache configuration for the ownCloud server is no longer automatic, requiring configuration in config.php with the keys memcache.local and/or memcache.distributed; see Config.php Parameters. Before the memcache.local can be used you need to install APC, APCu or XCache.
Caching improves performance by storing data, code, and other objects in memory.
The APC or OPCache bytecode cache are commonly used in PHP environments. This example installs APC on CentOS/Red Hat/Fedora systems running PHP 5.4:
$ sudo yum install php-pecl-apc
On Ubuntu systems running PHP 5.4 this command installs APC:
$ sudo apt-get install php-apc
PHP 5.5 replaces APC with OPCache. OPCache is bundled with PHP 5.5 so it should not be necessary to install it separately. OPCache improves PHP performance by storing precompiled script bytecode in shared memory, thereby removing the need for PHP to load and parse scripts on each request. This extension is bundled with PHP 5.5.0 and later, and is available in PECL for PHP versions 5.2, 5.3, and 5.4.
APC is both an opcode cache and data store. OPCache is only an opcode cache, so for caching user data you should also install APCu.
The Redis key-value cache and store is an excellent fast and robust cache. For configuration examples see Config.php Parameters.
Distributed PHP environments should use Memcached. Memcached servers must be specified in the memcached_servers array in ownCloud’s config file config.php. For examples see Config.php Parameters.
Note
When a memory cache has been configured, but is unavailable due to a a missing extension or server downtime, ownCloud will be inaccessible, as a memory cache is considered to be a vital component.
Tuning System Parameters
Configuration for more concurrent requests.
echo "2048 64512" > /proc/sys/net/ipv4/ip_local_port_range
echo "1" > /proc/sys/net/ipv4/tcp_tw_recycle
echo "1" > /proc/sys/net/ipv4/tcp_tw_reuse
echo "10" > /proc/sys/net/ipv4/tcp_fin_timeout

echo "65535" > /proc/sys/net/core/somaxconn
echo "65535" > /proc/sys/net/ipv4/tcp_max_syn_backlog
echo "262144" > /proc/sys/net/netfilter/nf_conntrack_max
Check if the values have been set accordingly:
# cat /proc/sys/net/ipv4/ip_local_port_range
2048 64512
# cat /proc/sys/net/ipv4/tcp_tw_recycle
1
# cat /proc/sys/net/ipv4/tcp_tw_reuse
1
# cat /proc/sys/net/ipv4/tcp_fin_timeout
10
# cat /proc/sys/net/core/somaxconn
65535
# cat /proc/sys/net/ipv4/tcp_max_syn_backlog
65535
# cat /proc/sys/net/netfilter/nf_conntrack_max
262144
Next, persist the settings across reboots by adding them into /etc/sysctl.conf:
net.ipv4.ip_local_port_range = 2048 64512
net.ipv4.tcp_tw_recycle = 1
net.ipv4.tcp_tw_reuse = 1
net.ipv4.tcp_fin_timeout = 10

net.core.somaxconn = 65535
net.ipv4.tcp_max_syn_backlog = 65535
net.netfilter.nf_conntrack_max = 262144
Tuning Memory
Add RAM disk to fstab:
- none /var/www/html tmpfs defaults,size=6g
Move PHP Code into RAM Disk:
# mv /var/www/html /var/www/html_fs
Copy ownCloud installation to RAM Disk and symlink storage to ownCloud data directory.
Note
ram disks are not reboot-safe. You need to establish a way to persist them, for instance by using cp or rsync to transfer them from a location on the hard disk to the ram disk before apache starts.
ownCloud Server Tuning
Serving static files via web server
See the section Serving Static Files for Better Performance for a description and the benefits.
Using cron to perform background jobs
See the section Defining Background Jobs for a description and the benefits.
Enable JavaScript and CSS Asset Management
See the section JavaScript and CSS Asset Management for a description and the benefits.
SSL / Encryption App
SSL (HTTPS) and file encryption/decryption can be offloaded to a processor’s AES-NI extension. This can both speed up these operations while lowering processing overhead. This requires a processor with the AES-NI instruction set.
Here are some examples how to check if your CPU / environment supports the AES-NI extension:
- For each CPU core present: grep flags /proc/cpuinfo or as a summary for all cores: grep -m 1 ^flags /proc/cpuinfo If the result contains any aes, the extension is present.
- Search eg. on the Intel web if the processor used supports the extension Intel Processor Feature Filter You may set a filter by "AES New Instructions" to get a reduced result set.
- For versions of openssl >= 1.0.1, AES-NI does not work via an engine and will not show up in the openssl engine command. It is active by default on the supported hardware. You can check the openssl version via openssl version -a
- If your processor supports AES-NI but it does not show up eg via grep or coreinfo, it is maybe disabled in the BIOS.
- If your environment runs virtualized, check the virtualization vendor for support.
SSL session reuse
You should enable SSL session tickets or SSL session identifiers in your web server. This will lead to lower delay in connection setup time for TCP connections to the ownCloud.
Webserver Tips
Enable the SPDY protocol
Your webserver can be configured to use the SPDY protocol which could improve the overall performance of ownCloud. Please have a look at the documentation of your webservers module for more information:
Note
If you want to enable SPDY for Apache please note the Known Issues of this module to avoid problems after enabling it.
Apache Tuning
Maximum number Apache processes
An Apache process is using around 12MB of RAM. Apache should be configured that the maximum number of HTTPD processes time 12MB is lower than the amount of RAM. Otherwise the system begins to swap and the performance goes down. In this case the maximum number is set to 6000.
KeepAlive should be configured with sensible defaults
KeepAlive On
KeepAliveTimeout 2
MaxKeepAliveRequests 10
mod_gzip
mod_gzip should be used because it speeds up the transfer of data and helps to free server memory, and HTTP connections are closed faster.
PHP safe mode
PHP safe mode has to be turned off. It is deprecated and will be removed in newer PHP versions.
MPM
Apache prefork has to be used. Don’t use threaded mpm with mod_php because PHP is currently not thread safe.
Hostname Lookups
# cat /etc/httpd/conf/httpd.conf
...
HostnameLookups off
Log files
Log files should be switched off for maximum performance.
Comment out the CustomLog directive. Keep ErrorLog to be able to track down errors.
MaxKeepAliveRequests 4096
<IfModule prefork.c>
        StartServers 100
        MinSpareServers 100
        MaxSpareServers 2000
        ServerLimit 6000
        MaxClients 6000
        MaxRequestsPerChild 4000
</IfModule>

<Directory "/var/www/html">
        Options Indexes SymLinksIfOwnerMatch AllowOverride All
</Directory>
Database Best Practice
Currently ownCloud supports the following relational database management systems:
- MySQL
- MariaDB
- PostgreSQL
- SQLite
- Oracle
SQLite is not supported in the Enterprise edition, and is not recommended except for systems with very light workloads, and for testing ownCloud.
We are using the doctrine database abstraction layer and schema evolution with a MDB2 Schema based table description in XML.
Using MariaDB/MySQL instead of SQLite
MySQL or MariaDB are preferred because of the performance limitations of SQLite with highly concurrent applications, like ownCloud.
On large instances you could consider running MySQLTuner to optimize the database.
See the section Database Configuration how to configure ownCloud for MySQL or MariaDB. If your installation is already running on SQLite then it is possible to convert to MySQL or MariaDB using the steps provided in Converting Database Type.
Improve slow performance with MySQL on Windows
On Windows hosts running MySQL on the same system changing the parameter dbhost in your config/config.php from localhost to 127.0.0.1 could improve the page loading time.
See also this forum thread.
Other performance improvements
Mysql: compare https://tools.percona.com/wizard to your current settings MariaDB: https://mariadb.com/kb/en/optimization-and-tuning/
Postgresql
Alternative to MariaDB/MySQL. Used in production by a few core developers.
Requires at least Postgresql 9.0
Other performance improvements
See http://wiki.postgresql.org/wiki/Performance_Optimization
Oracle Database
Usage scenario: Existing enterprise installations. Only core apps are supported and tested. Not recommended because it involves compiling the oci8
Other performance improvements
http://de.slideshare.net/cjorcl/best-practices-php-and-the-oracle-database and ask your DBA.
Problems
When ORA-56600 occurs (Oracle Bug 8467564) set this php.ini setting: oci8.statement_cache_size=1000, see oracle forum discussion
Scalability notes
When multiple installations are an option due to geographical or task related separation, using the Federated Cloud Sharing functionality to run separate ownCloud instances which link to each other can be helpful when scaling to hundreds of thousands of users. See Configuring Federated Cloud Sharing.
In general, scalability of ownCloud goes up significantly in each release. For example, ownCloud 8.1 can sustain over 50% more users on the same hardware as ownCloud 8.0 could. If the ability to have many users on a single ownCloud server is an important consideration, use the latest ownCloud Server and client versions.
Find more details and tips on deploying large ownCloud installations in Scaling Across Multiple Machines, the ownCloud whitepapers on owncloud.com and the ownCloud FAQ.
Nginx: caching ownCloud gallery thumbnails with fastcgi_cache_purge
One of the optimisations for ownCloud when using Nginx as webserver is to combine FastCGI caching with “Cache Purge”, a 3rdparty Nginx module that adds the ability to purge content from FastCGI, proxy, SCGI and uWSGI caches. This mechanism speeds up thumbnail presentation as it shifts requests to Nginx and minimizes php invocations which else would take place for every thumbnail presented every time.
The following procedure is based on an Ubuntu 14.04 system. You may need to adapt it according your OS type and release.
Note
Unlike Apache, Nginx does not dynamically load modules. All modules needed, must be compiled into Nginx. This is one of the reasons for Nginx´s performance. It is expected to have an already running Nginx installation with a working configuration set up like described in the ownCloud documentation.
Nginx module check
As a first step, it is necessary to check if your Nginx installation has the nginx cache purge module compiled in:
nginx -V 2>&1 | grep ngx_cache_purge -o
If your output contains ngx_cache_purge, you can continue with the configuration, else you need to manually compile Nginx with the module needed.
Compile Nginx with the nginx-cache-purge module
- Preparation:
cd /opt
wget http://nginx.org/keys/nginx_signing.key
sudo apt-key add nginx_signing.key
sudo vi /etc/apt/sources.list.d/nginx.list
Add following lines (in case, replace {trusty} by your distribution name):
deb http://nginx.org/packages/mainline/ubuntu/ trusty nginx
deb -src http://nginx.org/packages/mainline/ubuntu/ trusty nginx
Then run sudo apt-get update
Note
If you’re not overly cautious and wish to install the latest and greatest Nginx packages and features, you may have to install Nginx from its mainline repository. From the Nginx homepage: “In general, you should deploy Nginx from its mainline branch at all times.” If you would like to use standard Nginx from the latest mainline branch but without compiling in any additional modules, just run sudo apt-get install nginx.
- Download the Nginx source from the ppa repository
cd /opt
sudo apt-get build-dep nginx
sudo apt-get source nginx
- Download module(s) to be compiled in and configure compiler arguments
ls -la
Please replace {release} with the release downloaded:
cd /opt/nginx-{release}/debian
If folder “modules” is not present, do:
sudo mkdir modules
cd modules
sudo git clone https://github.com/FRiCKLE/ngx_cache_purge.git
sudo vi /opt/nginx-{release}/debian/rules
If not present, add the following line at the top under:
#export DH_VERBOSE=1:
MODULESDIR = $(CURDIR)/debian/modules
And the end of every configure command add:
--add-module=$(MODULESDIR)/ngx_cache_purge
Don’t forget to escape preceeding lines with a backslash \. The parameters may now look:
$(WITH_SPDY) \
--with-cc-opt="$(CFLAGS)" \
--with-ld-opt="$(LDFLAGS)" \
--with-ipv6 \
--add-module=$(MODULESDIR)/ngx_cache_purge
- Compile and install Nginx
cd /opt/nginx-{release}
sudo dpkg-buildpackage -uc -b
ls -la /opt
sudo dpkg --install /opt/nginx_{release}~{distribution}_amd64.deb
- Check if the compilation and installation of the ngx_cache_purge module was successful
nginx -V 2>&1 | grep ngx_cache_purge -o
It should show now: ngx_cache_purge
Show Nginx version including all features compiled and installed:
nginx -V 2>&1 | sed s/" --"/"\n\t--"/g
- Mark Nginx to be blocked from further updates via apt-get
sudo dpkg --get-selections | grep nginx
For every nginx component listed run sudo apt-mark hold <component>
- Regular checks for nginx updates
Do a regular visit on the Nginx news page and proceed in case of updates with item 2 to 5.
Configure Nginx with the nginx-cache-purge module
- Preparation Create a directory where Nginx will save the cached thumbnails. Use any path that fits to your environment. Replace {path} in this example with your file path:
sudo mkdir -p /usr/local/tmp/cache
- Configuration
sudo vi /etc/nginx/sites-enabled/{your-ownCloud-nginx-config-file}
Add at the beginning, but outside the server{} block:
fastcgi_cache_path {path} levels=1:2 keys_zone=OWNCLOUD:100m inactive=60m;
Add inside the server{} block, as an example of a configuration:
set $skip_cache 1;

# POST requests and urls with a query string should always go to PHP

if ($request_uri ~* "thumbnail.php")
{ set $skip_cache 0;
}

fastcgi_cache_key "$scheme$request_method$host$request_uri";
fastcgi_cache_use_stale error timeout invalid_header http_500;
fastcgi_ignore_headers Cache-Control Expires Set-Cookie;

location ~ \.php(?:$/) {
      fastcgi_split_path_info ^(.+\.php)(/.+)$;

      include fastcgi_params;
      fastcgi_param SCRIPT_FILENAME $document_root$fastcgi_script_name;
      fastcgi_param PATH_INFO $fastcgi_path_info;
      fastcgi_param HTTPS on;
      fastcgi_pass php-handler;

      fastcgi_cache_bypass $skip_cache;
      fastcgi_no_cache $skip_cache;
      fastcgi_cache OWNCLOUD;
      fastcgi_cache_valid  60m;
      }
- Test the configuration
sudo service nginx restart
- Open your browser and clear your cache.
- Logon to your ownCloud instance, open the gallery app, move thru your folders and watch while the thumbnails are generated for the first time.
- You may also watch with eg. htop your system load while the thumbnails are processed.
- Go to another app or logout and relogon.
- Open the gallery app again and browse to the folders you accessed before. Your thumbnails should appear more or less immediately.
- htop will not show up additional load while processing, compared to the high load before.